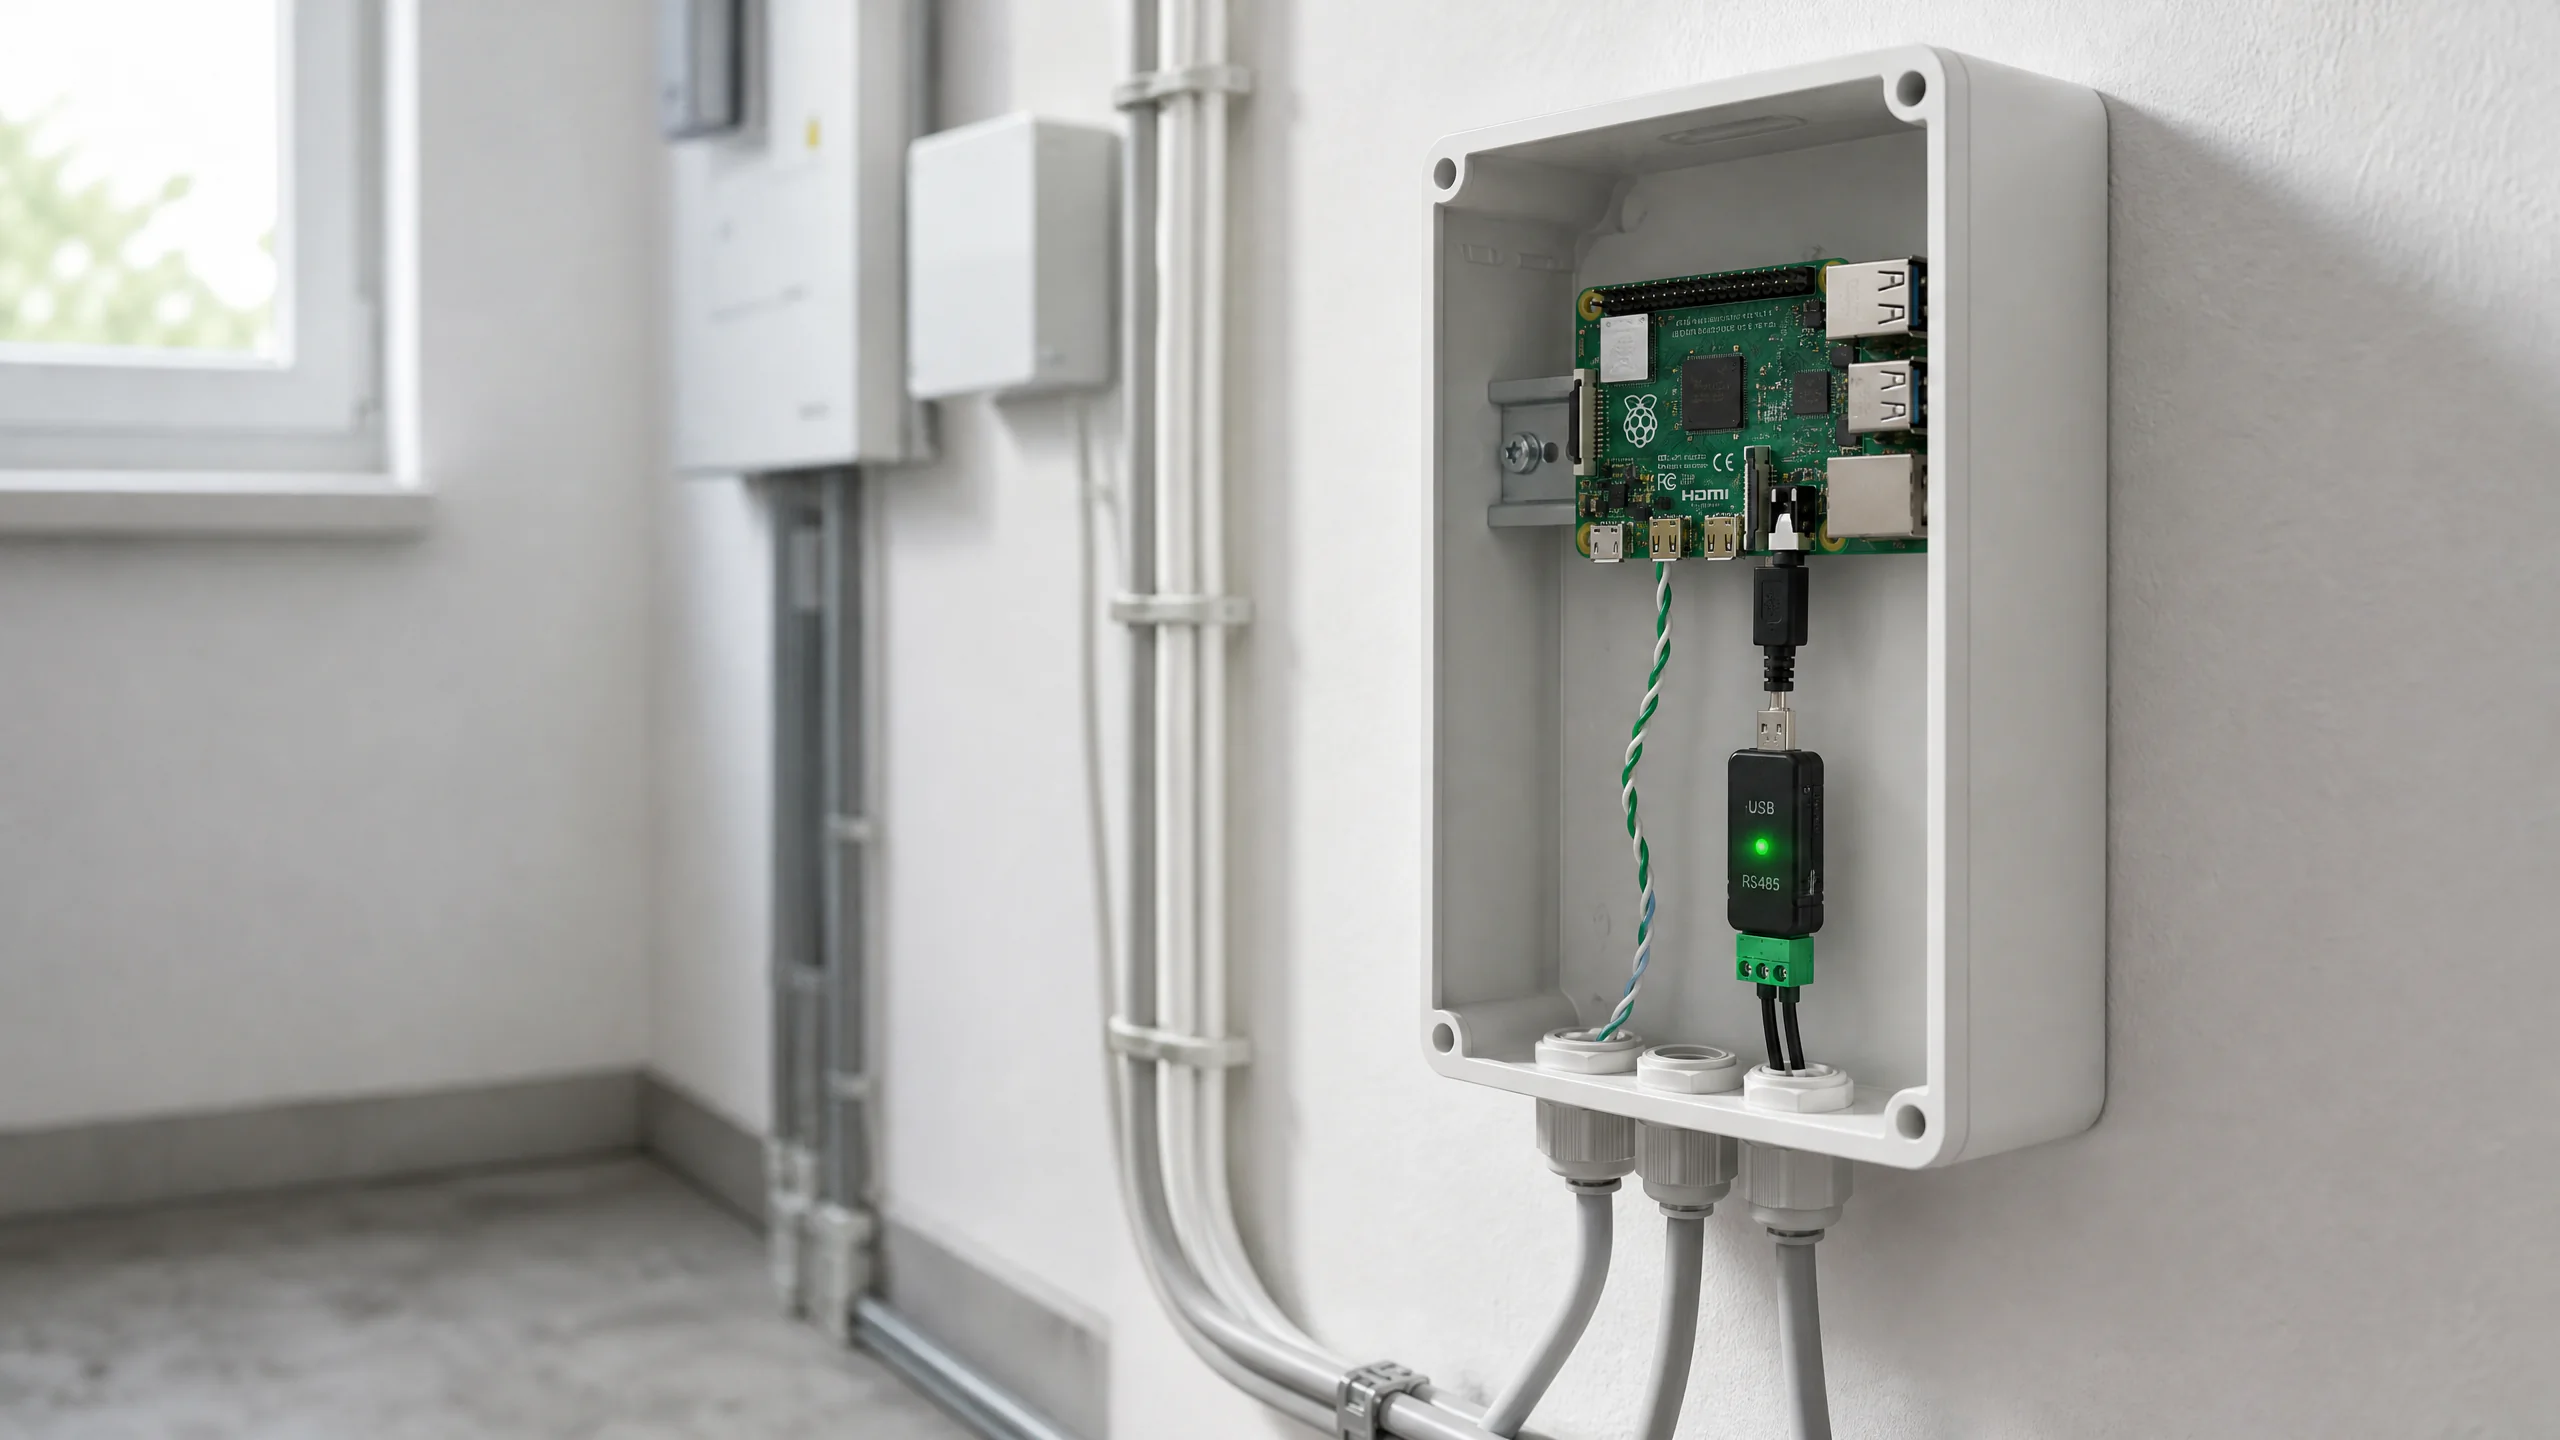
Raspberry Pi with RS-485 adapter in home technical room
Standard Modbus RTU · No Cloud · Offline Ready

Modbus RS-485
Full Local Control

Direct wired access to your Conow energy device over standard Modbus RTU. No cloud account, no internet, no vendor lock-in. Your data never leaves your network.
🔌 Standard Modbus RTU — not a proprietary protocol

Any EMS, any platform, any language that speaks Modbus can read and control your device. Zero learning curve if you have used Modbus before.

What you get

📊 Real-time Monitoring

Battery SoC, grid power, PV input, charge/discharge — all readable from registers 10000–10036, polled every 5 seconds.

🎛️ Write Control

Power limits, off-grid switch, force charge/discharge — writable via registers 10100–10107. Instant write + read-back.

📡 Standard Protocol

Plain Modbus RTU over RS-485. Works with Home Assistant, ioBroker, openHAB, Node-RED, or your own Python script.

🔒 Zero Data Egress

Nothing leaves your local network. No API keys, no cloud tokens, no telemetry. The wire is the only connection.

📖 Open Register Maps

Full Modbus register documentation published on GitHub — addresses, data types, scale factors, frame examples.

⚡ 5-Second Polling

Default 5s interval balances responsiveness and RS-485 bus load. Write commands trigger immediate read-back.

Wiring & connection

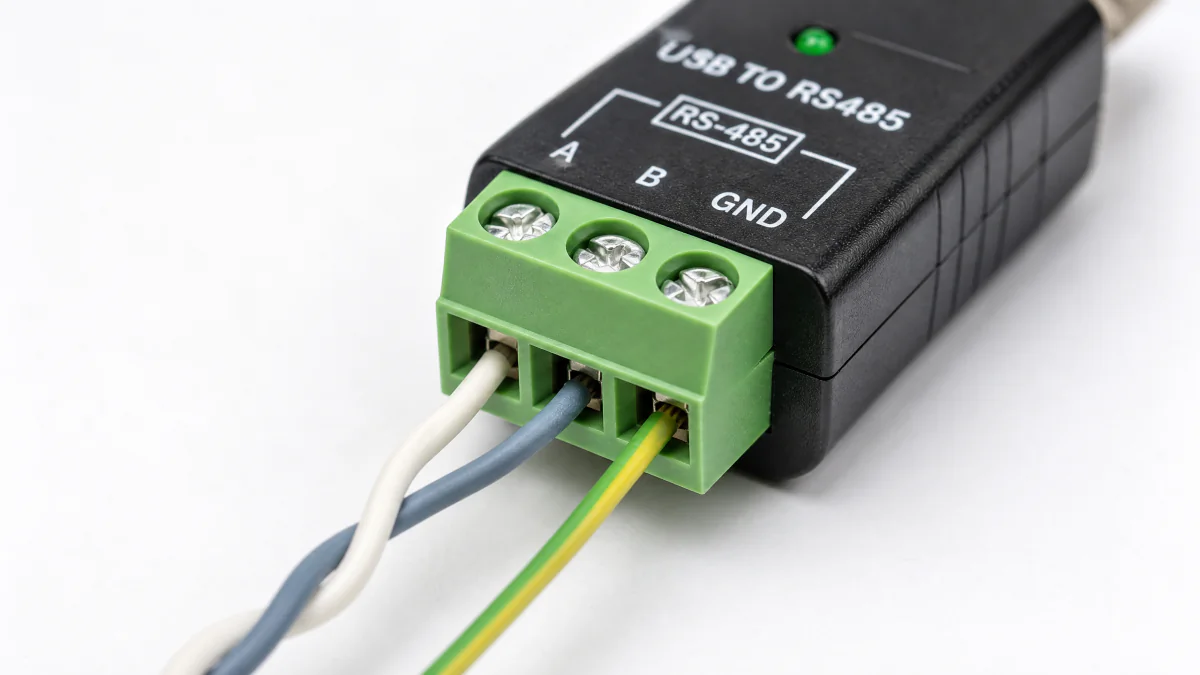
USB-to-RS485 adapter with A, B, GND terminal block wiring

Connect a USB-to-RS485 adapter between your Home Assistant host and the Conow device RS-485 port. Match A/B polarity exactly to the device label — reversed polarity is the most common wiring mistake.

Recommended: FTDI-based or CH340-based adapters with screw terminal blocks. Twisted-pair cable up to 30 m works reliably at 38400 baud.

┌─────────────────┐ RS-485 ┌──────────────────┐ │ Conow Device │ A ─────── A │ USB-RS485 Adapter │ │ (Lyra / CBE) │ B ─────── B │ → HA Host / Pi │ │ │ GND ─── GND │ /dev/ttyUSB0 │ └─────────────────┘ └──────────────────┘ A/B polarity must match the device label.
ParameterValueNotes
Baud rate38400Factory default
Data bits88N1
ParityNone
Stop bits1
Slave address160 (0xA0)Default; configurable

Setup guide

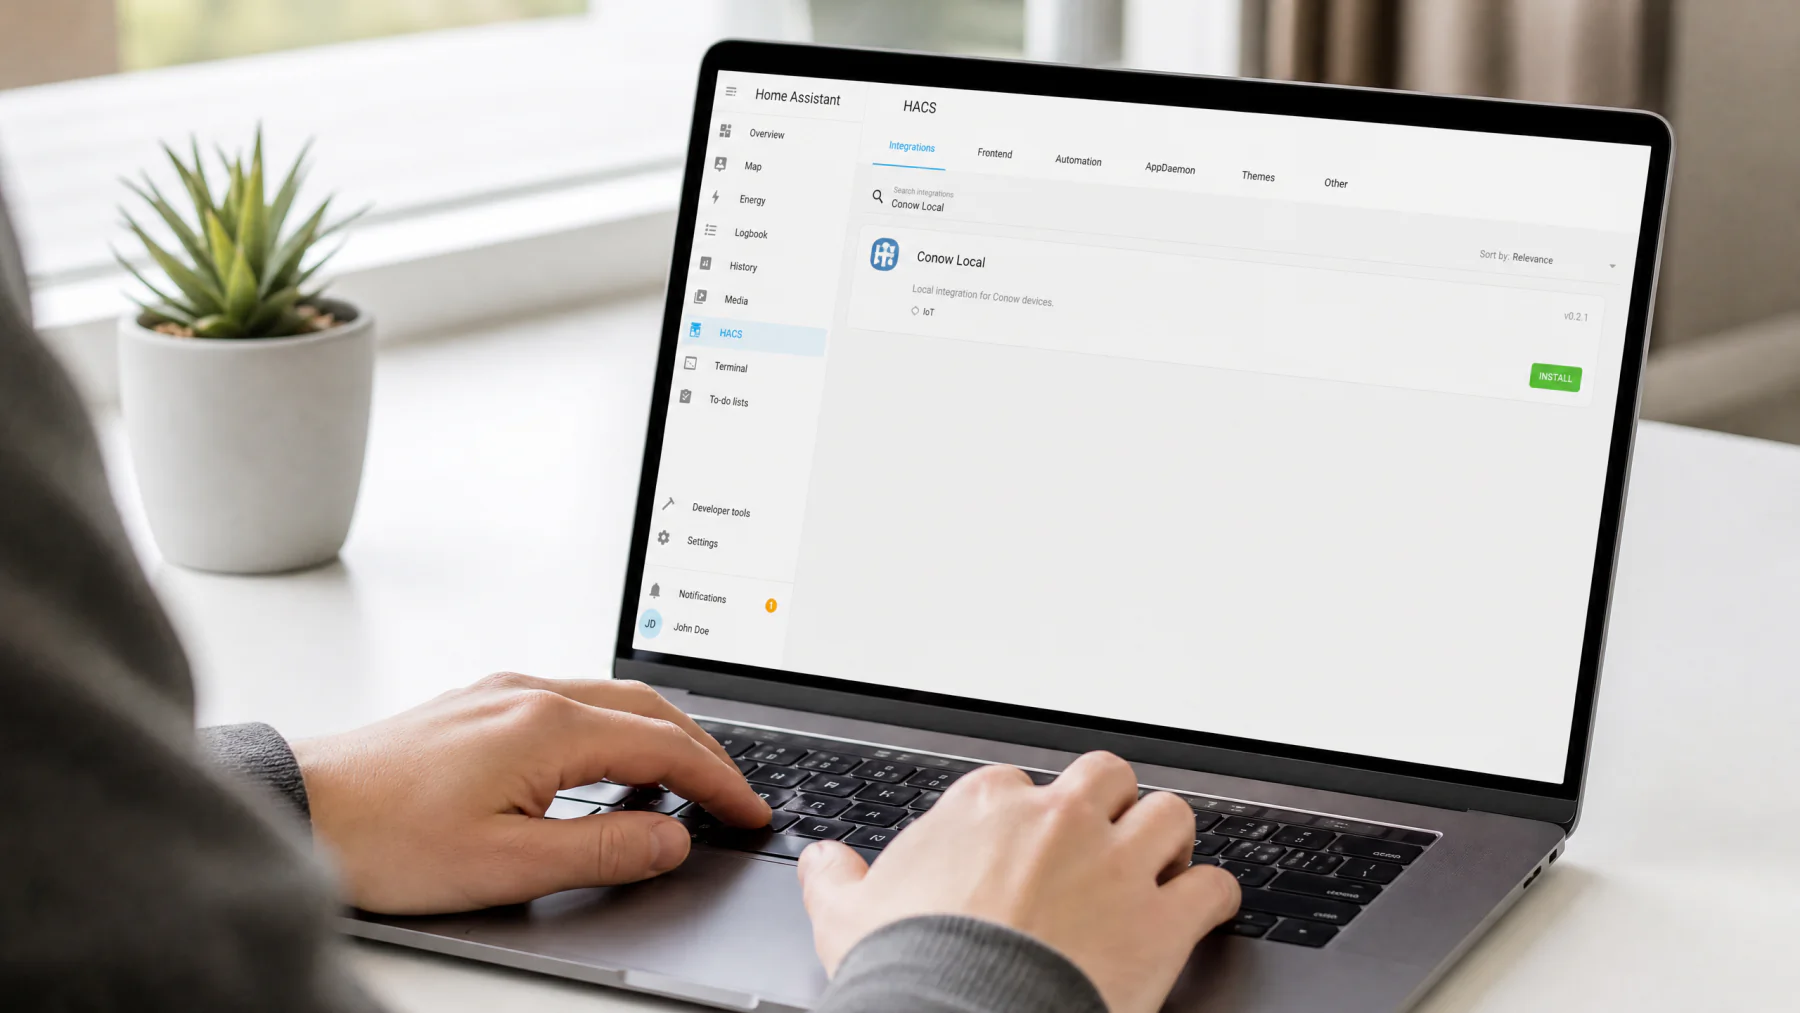
Installing Conow Local integration via HACS on Home Assistant

Installing the Conow Local integration via HACS — search, install, configure serial port and slave address.

1

Activate the device in the App

The device must be commissioned and online in the Conow ECO App at least once. RS-485 will not work on a factory-fresh device that has never been activated.

2

Enable DIY Mode

Modbus RTU is disabled until you turn on external control. In the Conow ECO App:

# Option A — DIY Mode (recommended) Conow ECO App → Devices → [your device] → Settings → Operation Mode → DIY Mode # Option B — Enable External Control Conow ECO App → Devices → [your device] → Settings → Enable External Control

⚠️ Until DIY Mode or External Control is enabled, the device will not respond to Modbus commands.

3

Wire the RS-485 adapter

Connect an RS-485 to USB adapter between your Home Assistant host and the device RS-485 port. Match A/B polarity to the device label.

# Find your serial port # Linux / HA OS: ls /dev/ttyUSB* /dev/ttyACM* # macOS: ls /dev/cu.* # Docker: pass device through docker run ... --device /dev/ttyUSB0:/dev/ttyUSB0
4

Install via HACS & configure

Add the repository as a custom HACS integration, install "Conow Local", restart HA.

# HACS → Integrations → Custom Repositories https://github.com/conow-labs/home-assistant-local # Then: Settings → Devices & Services → Add Integration → Conow Local # Configure: # Serial port: /dev/ttyUSB0 # Slave address: 160 # Baud rate: 38400

Register map overview

Full documentation at conow-labs/developer-docsmodbus/

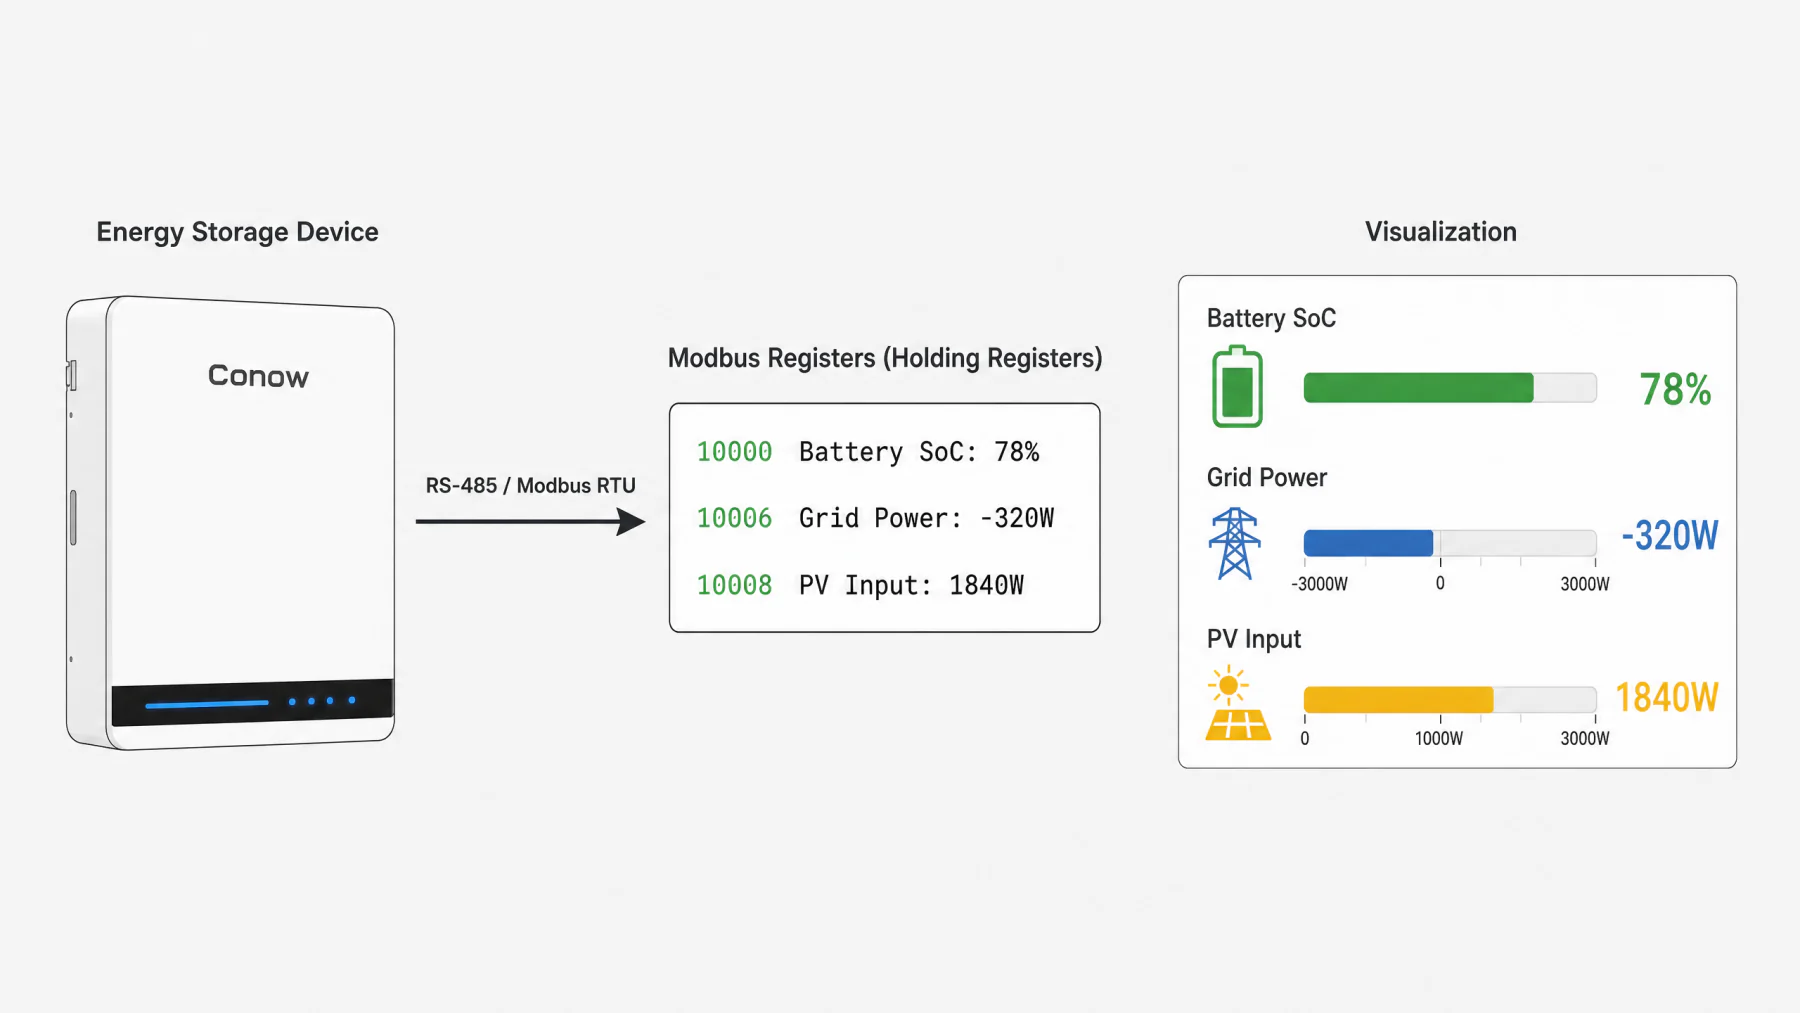
Modbus register data flow — device to register values to visualization

Modbus RTU data flow: device registers → 5-second polling → real-time energy dashboard values.

📊 Monitoring Registers 10000–10036 · Read-only

10000   Battery SoC     uint16 · scale 1 · %
10001   Battery voltage     uint16 · scale 0.01 · V
10002   Battery current     int16 · scale 0.01 · A
10004   Battery power     int16 · scale 1 · W
10006   Grid power     int16 · scale 1 · W
10008   PV total power     uint16 · scale 1 · W
10010   Inverter temperature     int16 · scale 0.1 · °C
10020+   Energy counters     uint32 · scale 0.01 · kWh

🎛️ Control Registers 10100–10107 · Read / Write

10100   Off-grid switch     uint16 · 0=off, 1=on
10101   Discharge power limit     uint16 · scale 1 · W
10102   Charge power limit     uint16 · scale 1 · W
10105   Force mode     uint16 · 0=stop, 1=charge, 2=discharge
10106   Force power     uint16 · scale 1 · W
10107   Force mode enable     uint16 · 0=disable, 1=enable

Live in Home Assistant

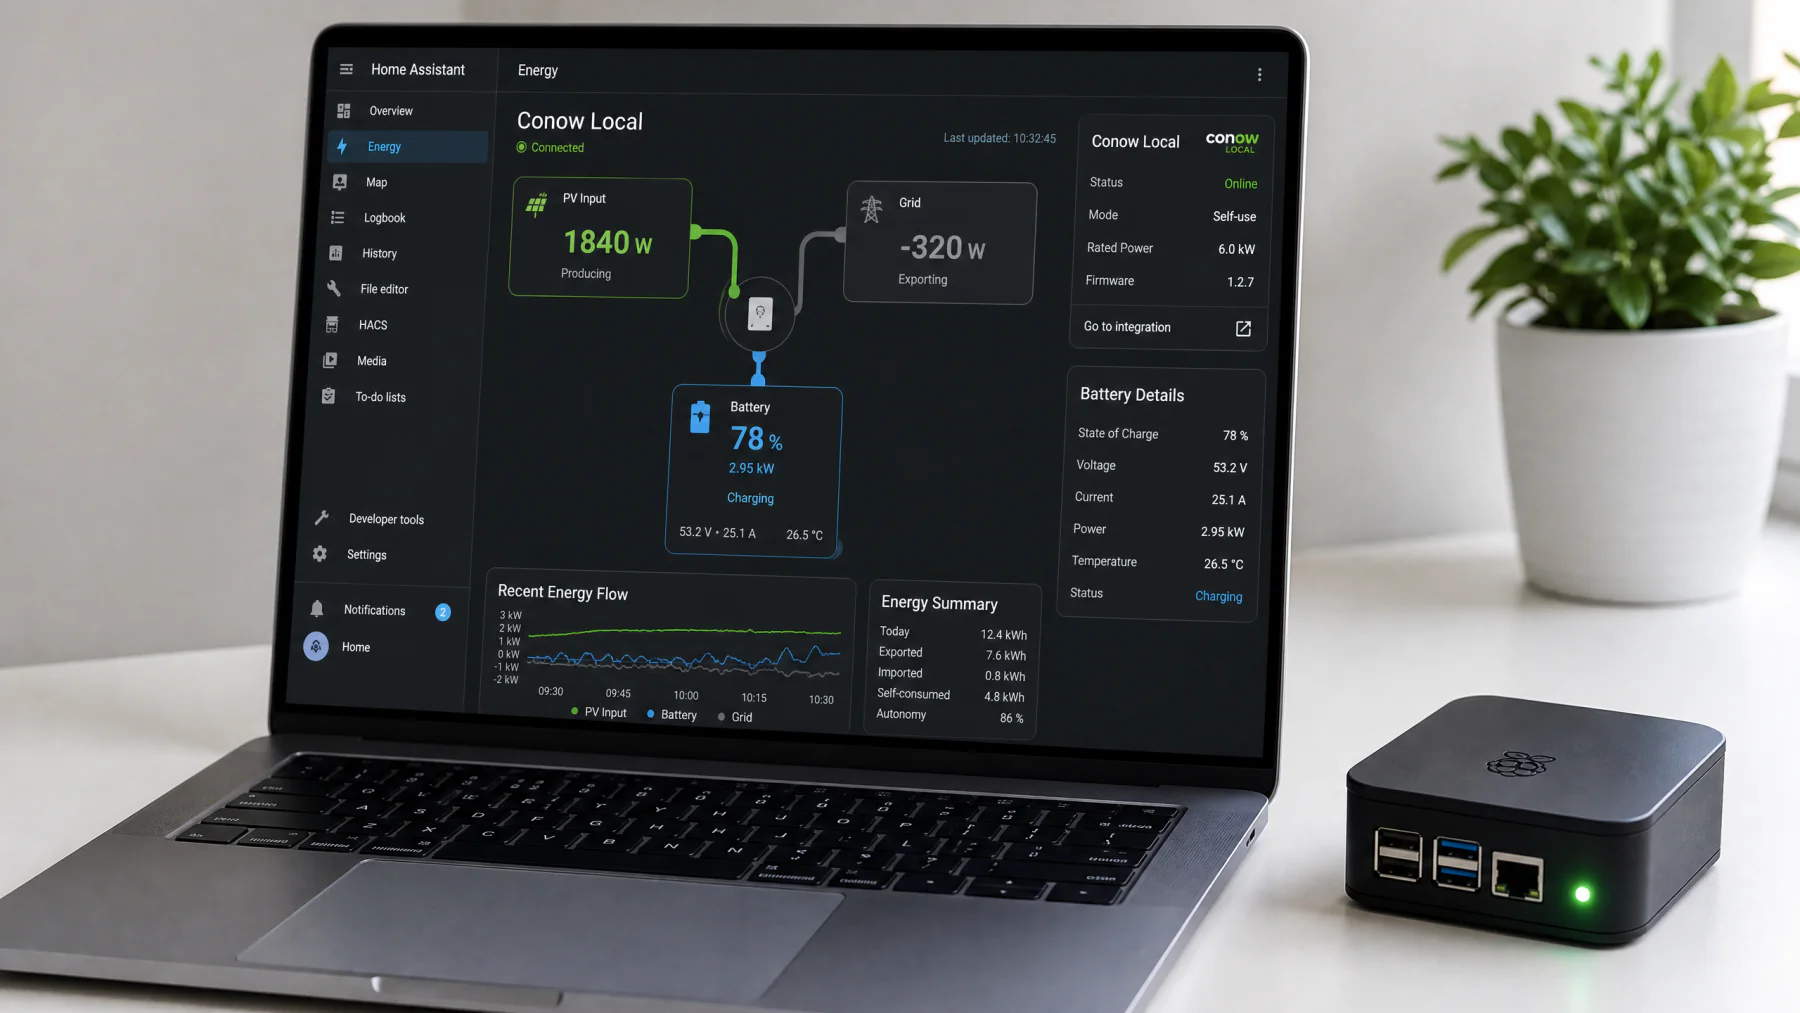
Home Assistant energy dashboard showing Conow Local integration with real-time data

Real-time energy flow in Home Assistant — battery SoC, PV input, grid export, all from local Modbus polling. No cloud required.

Example: write discharge limit 700W

# Modbus RTU frame — Write Single Register (FC 0x06) # Register 10101 → value 700 (0x02BC) A0 06 27 75 02 BC 8B 04 │ │ │ │ │ │ │ │ │ └── CRC16 (little-endian) │ │ │ └── Value: 700 │ │ └── Address: 10101 (0x2775) │ └── Function Code 0x06 (Write Single Register) └── Slave address 160 (0xA0) # Device echoes the same 8 bytes on success

Good to know

💡 Modbus takes priority while active

When Modbus communication is polling, the device only follows Modbus commands. App/Cloud DIY instructions are not applied simultaneously.

💡 Two control paths do not merge

Modbus real-time control and platform/App DIY schedule are independent. Only one path is active at a time.

⚠️ Keep DIY Mode enabled

Even though Modbus takes priority at runtime, you must keep DIY Mode or External Control turned on in the App.

⚠️ Serial port conflicts

Only one program can use the serial port at a time.

Supported devices

DeviceTypeProtocol Doc
CBE2000 ProBalcony solar storage (all-in-one)modbus/balcony-solar-storage.md
Lyra 2500 AC / ProAC-coupled storagemodbus/balcony-solar-storage.md
Atlas SeriesHigh-capacity storagemodbus/ (coming)

Ready to go local?

Full register documentation, code examples, and HA integration — all open source.